This article will show you how to create & customise the LeadConverter widget. You’ll learn how to tailor what users can see, adjust display & design settings, manage coverage, enable integrations, and retrieve embed codes for your website.
- Access the Admin section by clicking on your initials on the top right corner of the screen.
- Select Admin from the dropdown menu.

-
Click LeadConverter in the left side panel.
-
Click Create Widget to add a new widget.

Settings (Display)
- Start in the Settings > Display section.

- Click the green circles to activate or deactivate each display option within your LeadConverter widget on your website.
| Search Bar | Display the Address Search Bar. |
| Show Estates | Activates the Estates tab. |
| H&L Package | Shows all published House & Land packages. |
| Land | Yet to be activated. |
| Prices | Displays all design prices. |
| Authentication | Enables clients to save their previous sessions & return to them later. |
| Only Selected Designs | Shows a limited selection of designs from your SiteCheck account. |
| Download Flyer | Allows clients to download a pre-configured flyer. |
| Bottom CTA | Enables the call-to-action panel including Stripe payment options & external links. |
| Single Sign-On (SSO) | Auto authentication — receives user details from 3rd party website. |
| Leads Inquiry | Enables the Enquire button on the site — allowing clients to submit their contact information. |
| Splash Screen | Create a custom load screen for the widget. |
| 3D | Disaplys 3D imagery by default in the widget. |
-
Click Update to save or Cancel to revert changes.

3D Imagery
Select the default mapping style that loads when 3D is selected (this can be changed by users later).

Aerial Imagery
Choose from Map or Satellite imagery to first load up on the LeadConverter. Users will be able to toggle this as well.

Host Names and Search Bar Landing URL
The Host Names and Search Bar Landing URLs determine which pages will be authorized to display the LeadConverter search bar and widget.
The Host names are the URL(s) of the specific page(s) where the address search bar will appear that takes a user to the LeadConverter widget. Typically the home page or specific landing page(s).

The Search Bar Landing URL refers to a particular page on your website where the LeadConverter widget will be embedded.
Design Card Images Control
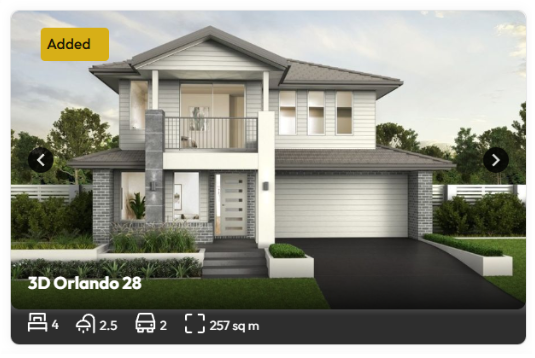
The Design Card Images Control section allows you to customize whether you would like to display Floorplans, Facade images, or Gallery images in the LeadConverter widget.
- Click, hold, and drag the dots on the left to adjust the order you would like to display the options in the LeadConverter widget.
- Toggle on which options you would like to display.

Plan refers to the floor plan of the design that is placed on the site.

Facade is the front elevation image that represents the completed build.

Gallery includes any additional images or lifestyle photos of the design.

Auto Apply Filter
The Auto Apply Filter section allows you to configure which filters will be applied by default when designs appear in the LeadConvertor widget.
-
Filter by fit – Only shows designs that will fit within the building envelope of the parcel of land.
-
Sort by Size – Organises designs based on total area.
-
Sorting Option – Sorts the designs in either ascending or descending order.

Manage Splash Screen
The Manage Splash Screen section allows you to configure the automatic pop-up that will appear after a user searches an address and loads the LeadConverter widget eg. a welcome message or introductory video with instructions.
- Click the Gear to create a custom Splash Screen.

-
Create a custom Splash Screen for Web or Mobile.
-
Add an image, video file, or HTML code to customise the appearance or embed additional content.
-
Click Save to finalise

Settings (Customize Design)
-
Adjust the visual style & branding of the LeadConverter widget.
-
Choose colours & set placeholder text in all textboxes.
- Click Update to Save.

Integration
-
Toggle each integration you want to activate.
-
Click the Green Button on the chosen integration to authorise it.
-
Click Update to save.
The Integrations will only display after you have saved the widget and come back to this section.

Coverage
By default, all estates & regions are enabled to match your SiteCheck account. Your list of Build Types will match your SiteCheck account some of which can include Houses, Pools, Sheds & Granny flats.
-
Select from available Build Types.
-
Choose specific Estates.
-
Select specific Regions from the coverage list.

- Drag the blue rectangle on the map to limit the coverage area.

- Click directly on a region on the map to add it to your list.

Summary
- Enter / edit the Reference name of the widget.
The Reference name is just an internal name that you would like to give to the widget. It helps identify the widget if you decide to create multiple widgets for different websites or landing pages.

- Review and confirm all Display settings.

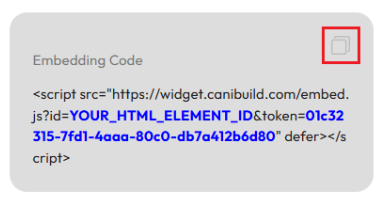
- Click Copy to obtain the Embedding Code.
The Embedding Code is the HTML that you will need to copy and paste in the back-end code of your website within the specific landing page where you would like the LeadConverter widget to be displayed.

- Click Copy Search Bar Script to access the search bar code.
The Search Bar Embed Code is the HTML that you will need to copy and paste in the back-end code of your website where you would like the LeadConverter search bar to be displayed. It is recommended to include in the hero image section or first-fold of your website so it is easy for website visitors to find it.

Embed Script
- Click the Copy icon on the right side of the Embed Script to copy the HTML code to paste in your website.

Customisation Script (Advanced Users Only)
- Click the Copy icon on the right side of the Customisation Script if you would like the ability to further customise the LeadConverter widget. This is only recommended for advanced users as will require custom coding.

- Click Update to Save.


