
This article will explain the differences between the standard and advanced site plan. The advanced site plan comes with a range of customizations including page sizes, scales and multiple display options that can be adjusted for every page.
The standard site plan within canibuild is set to always display in A3 or Tabloid (11 x 17″ or 279 × 432 mm) and will always work to the main two set scales unless the boundary exceeds this. This is where the Advanced Site Plan comes in with the flexibility to adjust every variable.
 |
Advanced Site Plan - Activates the Advanced Site Plan feature. |
 |
Toggle Contours - Display or turn off the elevation lines. |
 |
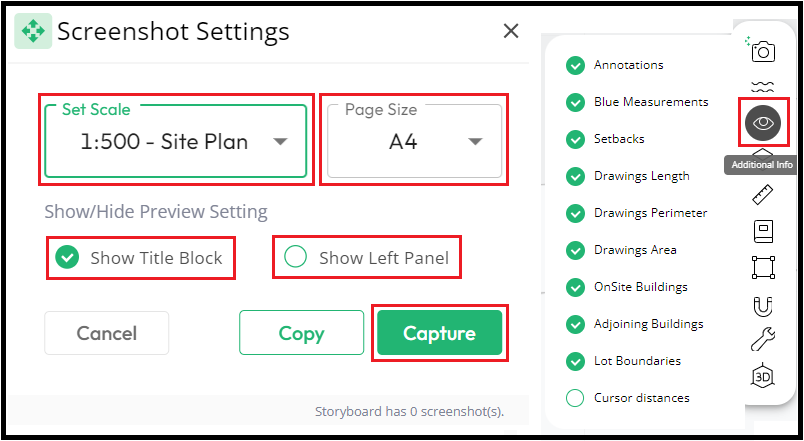
Additional Info - Toggle on and off a range of site information. |
 |
Look up layers - Controls any overlays and turns off trees. |
- Set up the site with all relevant details.
- Click the Advanced Site Plan button to begin.
- Click and hold on the Plus on the top left corner of the menu boxes to moved them around.
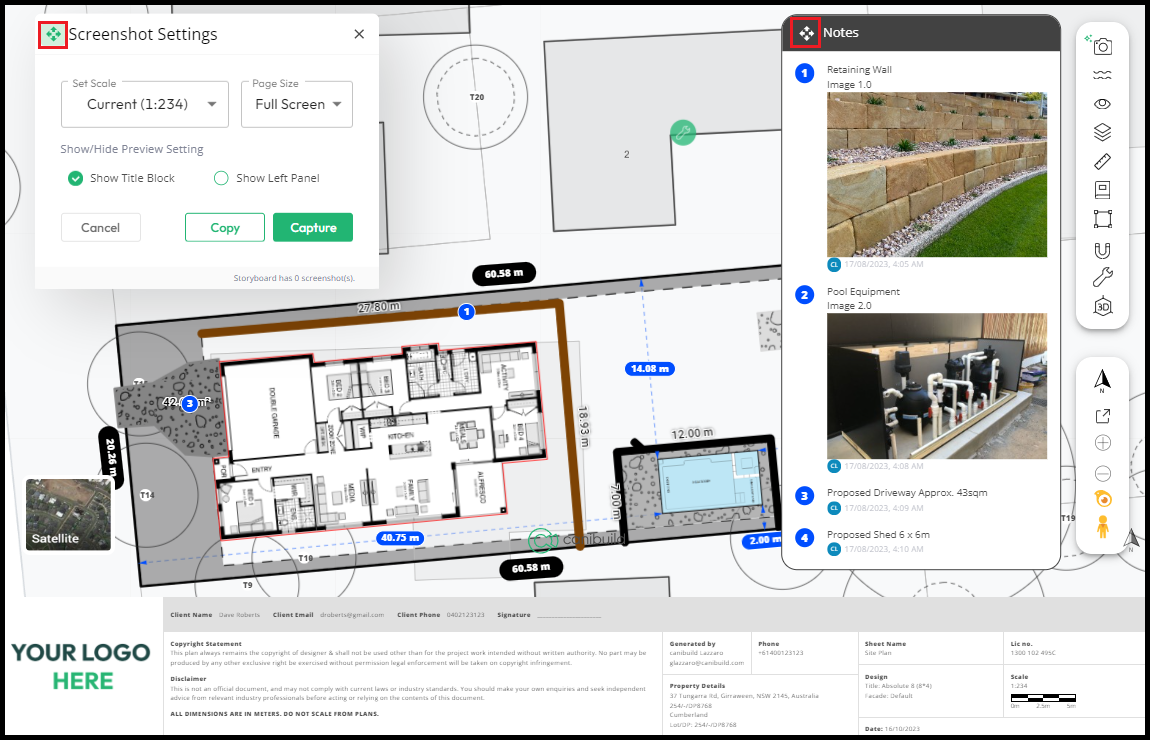
- Click Page Size and select from the options.
- Click Set Scale and choose the required scale for page one.
- Click Additional Info and deselect anything that is not required.
- Click Contours if required.
- Click Look up Layers if required to turn off trees.
- Deselect Show Title Block to turn it off.
- Select Show Left Panel to display the basic site info menu.
- Click and drag the map to make sure the whole property is visible.
- Click Capture.
Repeat the previous step by clicking + Add for each page until all information is captured. At any time a page can be downloaded, shared or deleted.
- Click Save As to print (For more than one page print to PDF).
